Battle Arms Development – Ambi Safety Selector (B.A.D.-A.S.S.)

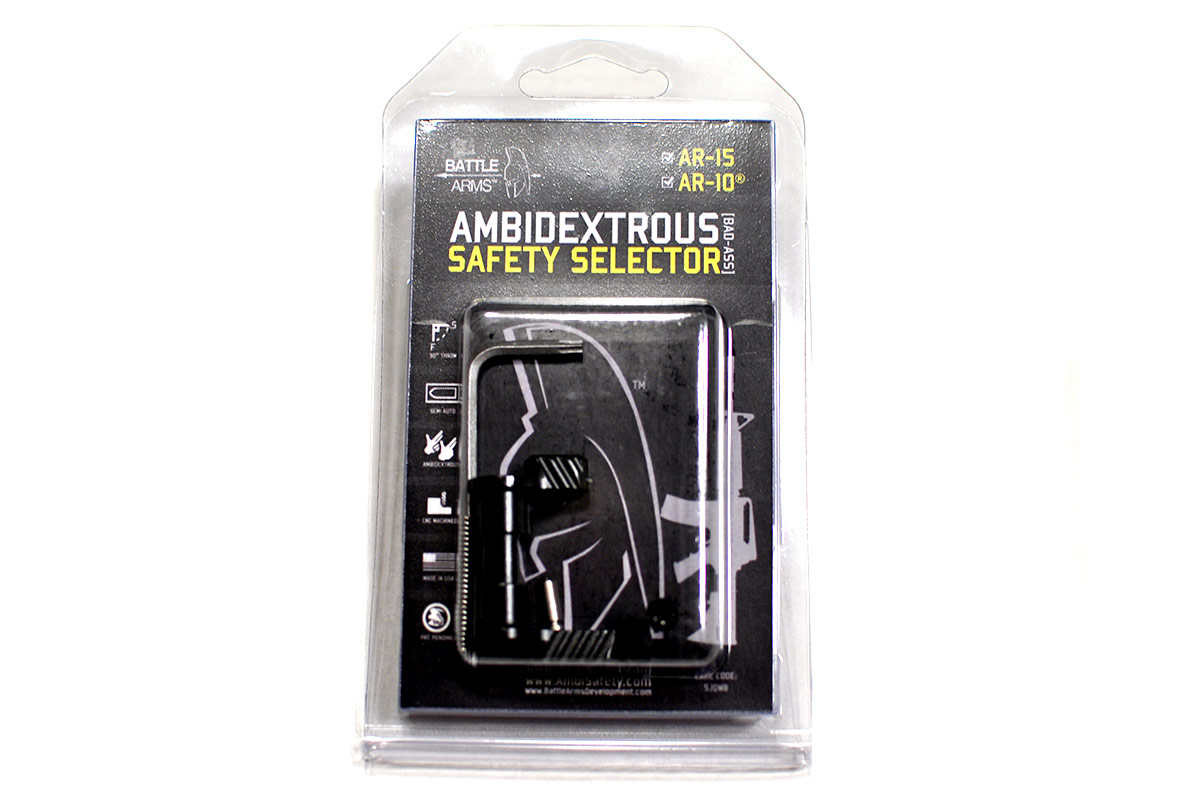
For my next AR-15 build out, using the BCM-KMR-13 rail that I recently picked up and one of my Coronado Arms lowers, I wanted to go the ambidextrous route with the safety selector. After doing a little digging around, the Battle Arms Development – Ambidextrous Safety Selector (BAD-ASS) looked like a good choice, and was priced well ($52.00 on Amazon).
 

BA-SS-03
A selector with 5 different types of levers and 25 possible configurations.

 
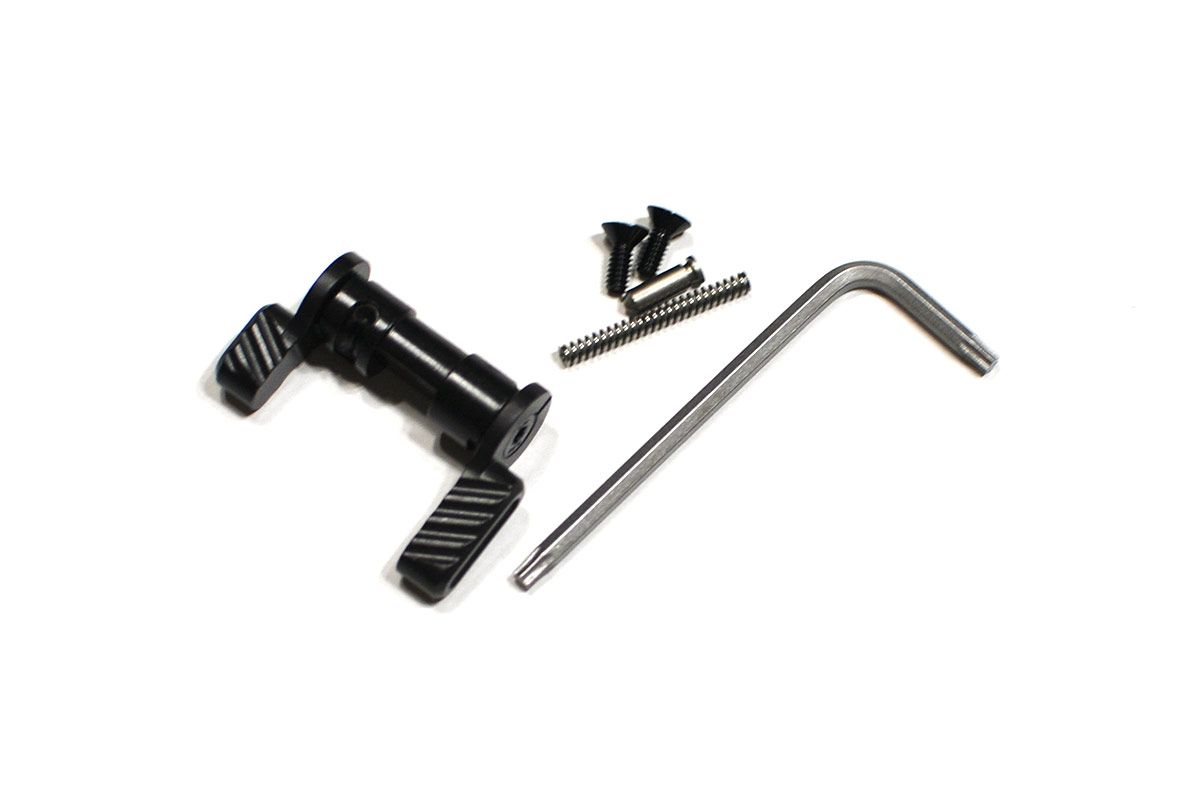
The selector I picked up is a standard 90 deg throw selector with the standard levers (one standard and one short lever). They offer 5 different types of selector levers (Hybrid, Short Thin, Short, Standard, and Thin) and can be “configured in 25 combinations”. They also make a short throw version, but I haven’t had any experience with them. If you want to see the different lever types, check out Battle Arms’s website.
 
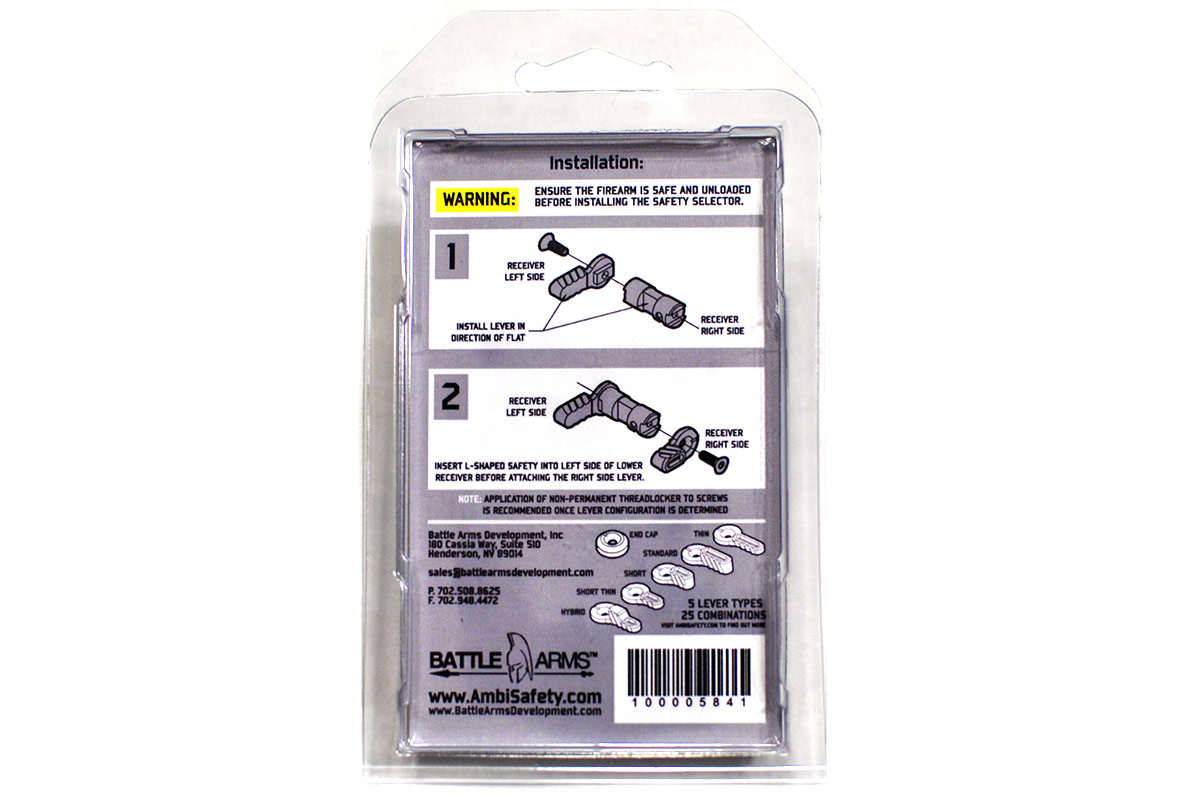
I got the selector in the mail and it was a simple install, as expected. If you’ve never installed a new selector before, it’s a pretty simple process (short list of basic instructions below)…

  1. Make sure your AR-15/10 is unloaded and safety checked.
  2. Remove the pistol grip which holds in the selector detent and spring. Then remove the detent and spring.
  3. Remove the selector by sliding it out the side of the lower. You may have to wiggle it around a bit to get it to clear the trigger assembly.
  4. Remove the right side (short end) selector lever from the ambi selector.
  5. Slide in the selector the same way you removed the old one, usually it goes in the easiest when angled towards the safe position. You will probably have to wiggle it around a bit to clear the trigger assembly.
  6. Once the selector is in place, attach the right side selector lever and then make sure the selector moves freely and you can check the trigger, etc.
  7. Reinstall the detent, detent spring and the pistol grip.
  8. Function check the trigger, safety, etc.
NOTE: Once you are sure you want to keep everything as it is, you should put some non-permanent thread-locker (blue loctite, or similar) on the screws in the selector.

 
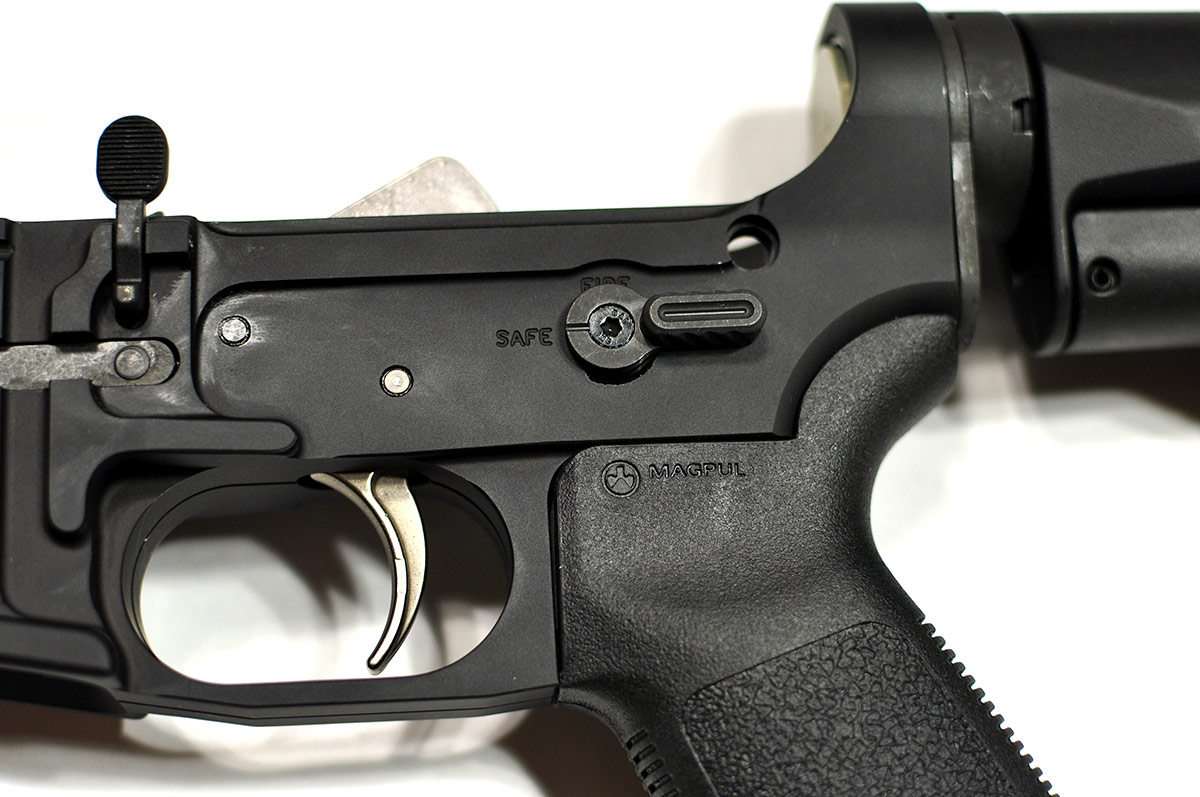
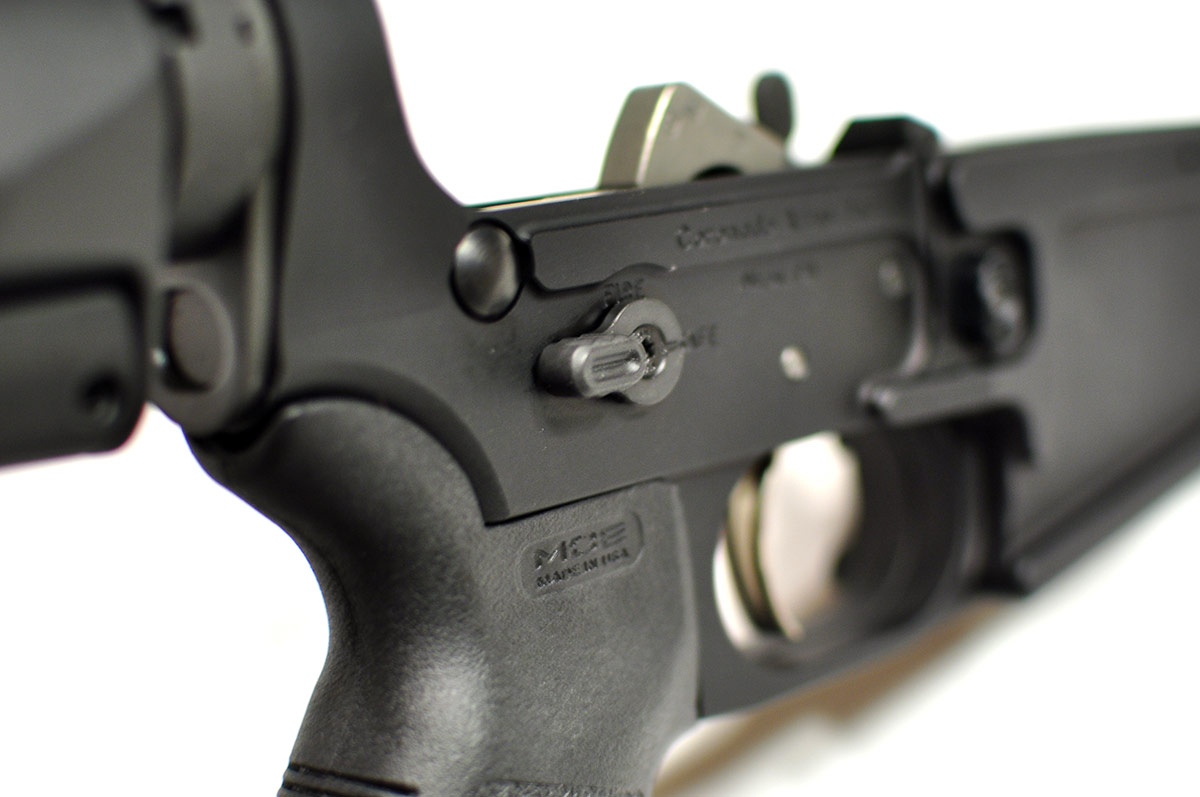
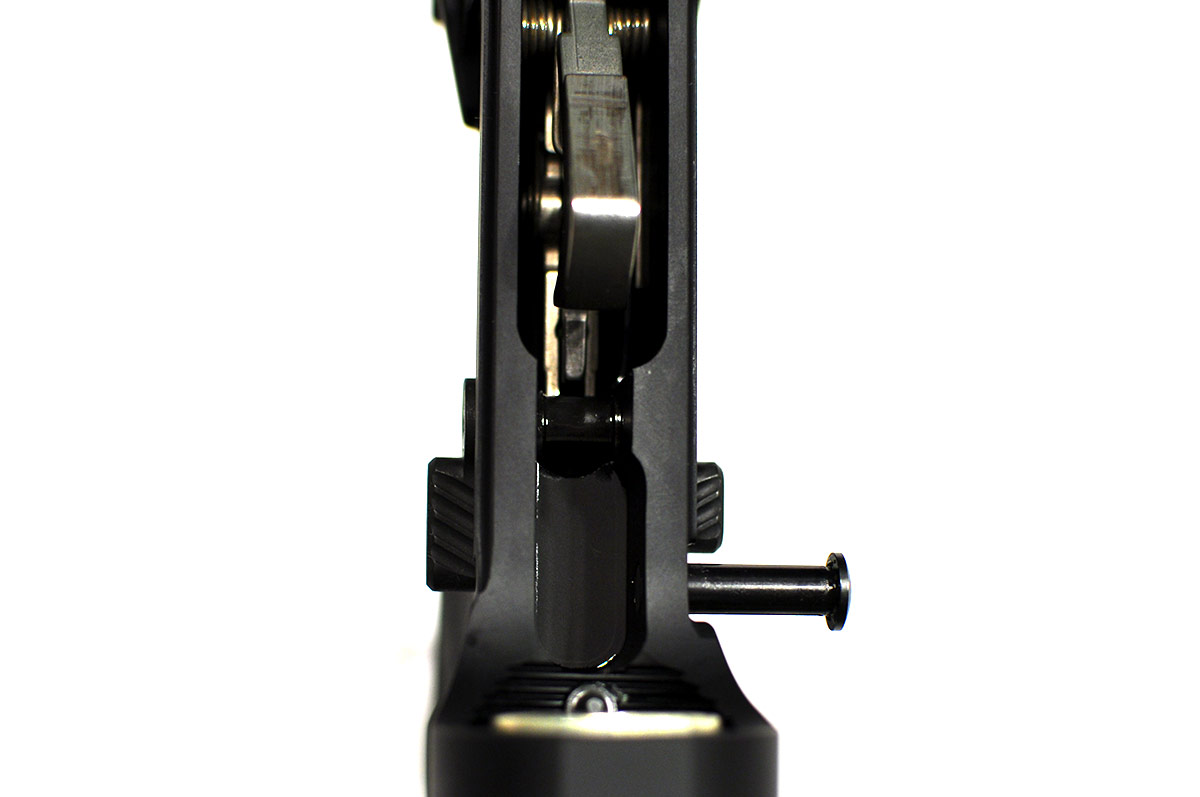
Overall, I like the selector. It feels very well made; it is CNC machined and made in the USA. The levers are smooth and rounded but have notches cut into them; the notches provide sufficient grip to easily operate the selector without slippage. The selector movement itself is a little stiff, but it’s getting smoother the more I use it. I put a little oil on it and it’s working in nicely.
 
Using the selector on the weak side is a little tough, it’s definitely doable, but it’s not easy; if you’ve ever tried to do manipulation weak handed, it takes practice, practice and more practice. So over time, I’m expecting the movement to get easier and easier. You have to make sure you press the lever at the correct angle, etc. Once you do, it snaps pretty quickly and easily.
 
The short lever doesn’t interfere with my shooting hand when in the fire position. If you have smaller hands you may have some issues and want to get the “thin short” lever; it should eliminate any interference issues. In reality, you may want to look into the thin short lever for the weak side just to eliminate the possibility of any interference. But that being said, you still need to make sure you can manipulate the selector, so make sure you try it out and practice with it.
 
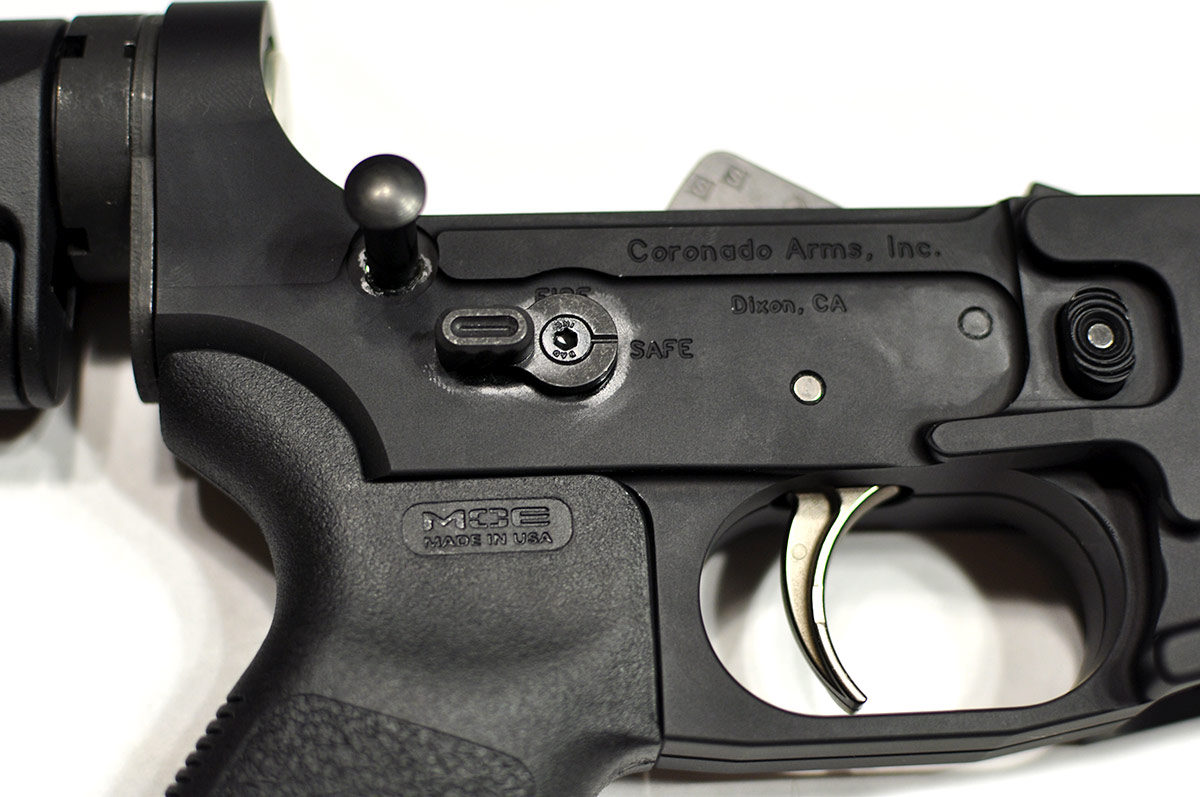
Another thing I noticed is that the back of the selector levers are flat (not notched out) so if you have a grip that is thick, like a Hogue or some other oversized pistol grip, it may interfere with the selector. The grips I’ve tried out have been all Magpul grips, and they seem to work without any issue. So, if your pistol grip sticks out past the side of your lower, then you may have some interference issues.
 
Check out the slide show below to see what the selector looks like installed in my Coronado Arms lower.
 

BA-SS-01BA-SS-02BA-SS-03BA-SS-04BA-SS-05BA-SS-06BA-SS-07

 
If you want to pick up one of these ambi selectors, you can order one from Amazon, or from many online retailers.
Buy Now
 
If you have one of these selectors, let me know how you like it!

Vortex Sparc Red Dot

I recently decided to get a Red Dot for my AR-15 build out, I opted to go with the Vortex Sparc Red Dot. I mostly decided to go with it after the review by Mac on the Military Arms Chanel. He does a good review and some durability tests. Check it out.

Some things to note, I’ve found that with red dots and holographic sights, the way my eye is, causes the dot to be a little misshapen and not clear. This is my eye, and not the optic. In the video below I discuss some of the details around that and show some pictures and video of the reticle. Check it out!

You can pick one of these optics up on Amazon for $199, http://l.santsys.com/14MwsXs

Meprolight Tru-Dot Night Sights

I finally decided to pull the trigger, so to speak, and get
some upgraded sights on one of my Glocks. It’s been something that I had been
thinking about doing, but was on the fence for a while… I was hung up on what
brand to get, where to get them installed, and then how would I adjust them if I
needed to (not that I could adjust the factory sights either).

I took a look at the Trijicon and Meprolight sights at one
of my local gun shops, City Arms East in Pleasant Hill, CA.
It was strangely one of the only places I could find that would sell them to
me, and actually install them. Northern California, amongst its many issues,
really is lacking places for gun accessories and gunsmiths. I like to at least
attempt to support local, or semi-local, brick and mortar businesses, but that
is becoming harder and harder these days. They have to charge so much, that in
most cases, I just can’t justify spending the extra money. But, I digress…

The reason I chose the Meprolight sights, really was just a
factor of availability. The gun shop had the correct ones for my gun, and would
install them while I waited (it took about 10-15 minutes). The difference
between the two brands are pretty small from what I could tell. This is not
really going to be an in-depth discussion on, or a comparison of the different
brands, but simply a discussion of what I like about the Meprolights and what
my impressions are of them now that I’ve used them briefly.

So first things first, the basic construction of them is good. They are sturdy and have clean
lines. They don’t appear to have any burrs or discrepancies with the actual
sight dots and the dots glow quite bright in the dark, even after being tucked
away and out of the light for quite a while.

I did some initial low light shooting, and the dots were
surprisingly bright, and very easy to get a good sight picture with. I know,
from trying this with the factory sights, I would lose the sights in the
background when it got dark. With these, that’s not going to be a problem, not
in the least.

The model that I have are the ML-10222 (for 10mm and .45
ACP) with orange rear dots and a green front dot. For more information on them
from Meprolight, take a look here. You can also
take a look at them on Amazon, here (the ones on Amazon are a different model, so make sure to get the right ones
for your firearm).

A thing to note, and I’m sure this will pass with more
practice and usage, but I’ve noticed that I occasionally have a hard time
focusing on the front sight when the sights are glowing brightly (in very low
light situations). I think this is mostly related to the sensitivity of my
eyes, and it’s a different experience seeing these illuminated dots when its
dark. I can’t really explain the specifics, but it’s something that I thought
was worth mentioning. With a couple of dry-fire practice sessions, it’s getting
less and less pronounced. So I think with more training and getting used to
them, it will be a complete non-issue. This goes to show you that NOTHING makes
up for constant and consistent training with your firearms, especially if your
life depends on it.

Burris AR-P.E.P.R. Mount (30mm)

Specifications

Weight: 8.7oz
Overall Length: 5.3125 in.
Ring Length: 4.125 in.
Ring Spacing: 2.1875 in.
Ring Width: 1.75 in.
Ring Length: 1 in.
Height: 1 in. (rail to bottom of ring)

General

The Burris AR-P.E.P.R mount is sturdy and well constructed. The scope rings fit together quite well and are held down by 6 screws (3 on each side of the rings). Each ring also has a small (2 notch) Picantinny rail on the top. This will allow for the attaching of additional accessories above your scope.

The 1 in height of the mount will help many standard tactical style, low magnification scopes to clear a fold down rear site. And the forward offset of the scope allows for good eye relief on most short stalk weapons.

The only gripe that I might possibly have with this mount is the “Made in China” sticker it comes with.

Viking Tactics (VTAC) Padded Sling Review

I recently purchased the Viking Tactics (VTAC) padded sling from Bravo Company USA. This was my first purchase from them and everything went very smoothly. I will definitely use them in the future.

You can also get it here.

The sling is packaged in no-frills packaging (a plastic zip-loc bag). Included was the sling and a simple one page set of instructions on how to attach and use the sling.

Upon removing the sling from its packaging, the first thing that I noticed is the sling feels to be constructed very well and made of quality materials. The padded portion of the sling is connected to the main strap with multiple levels of stitching and appears to be very durable. The padding feels to be made of a high-quality foam (or foam like material) and is about 1/4″ thick and 2″ wide.

The sling does not come with any swivels, but can be attached to pretty much any swivel that will handle a standard 1″ wide strap. The sling is attached to the swivels by two plastic strap adjusters. Though the adjusters are plastic, they feel to be very dense and strong plastic and it does not appear that they will break under normal usage conditions.

The sling is equipped with a quick release buckle that allows for quick tightening of the sling by simply pulling on the loose end of the sling, and quick extension by simply pulling on the buckle lanyard. The quick release buckle is made out of metal and has a relatively strong return spring so it will stay tight and not slip while moving.

On my first use of the sling, I needed to cinch it up pretty tight as it’s designed to fit different size people with different amounts of gear, etc. So using it wearing just a t-shirt, you end up with a pretty long tail out of the quick release. But that is nothing that a quick extra piece of Velcro or a ruber band won’t fix.

Specifications

Model #: VTAC-MK2-BK
Length: 60in. / 1.52m (Fully Extended)
Construction: Cloth strap with a mix of plastic and metal components

Viking Tactical also has a demonstration video for how to use the sling.

Update: 11/21/2013

I’ve been using the VTAC sling for quite some time now; and figured it was worth doing an update… The sling has performed great, I’ve run it through many shooting classes, and drug it around all over the place and had no issues with form or function. I have it setup so I can use my AR-15 with the strong or weak hand, and it all just works. The only gripe that I have is with the sizing (length) of the sling. If I’m not wearing full kit (plate carrier + chest rig + mags + etc.) even with the sling fully cinched up there is still a little too much slack for my taste. I have a relatively small frame, but if you are less than 160lbs and don’t plan on wearing full kit, be prepared for this sling to not hold the gun against you very tight. It’s generally not a problem, but, it can get annoying if you are trying to do something while the gun is slung over you (it ends up flopping around a lot). So just something to be conscious of.

Midwest Heavy Duty QD Front Sling Adaptor

The Midwest Industries Heavy Duty front swivel, upon first impression, is definitely heavy duty. It has weight to it, and at its thinnest point is 1/8 in thick.

The swivel is detachable via push button and also has turn locks to limit rotation. This is a huge help with keeping your sling from getting twisted up. The one thing that I did notice about the swivel is that the bluing (or whatever they used to make the metal black) appears to stick to things and come off. It appears to just be excess coating, as rubbing it does not cause you to get to bare metal, but I did need to wipe the parts off a bit to keep it from turning everything that touched it black.

Specifications

SKU #: MCTAR-08HD
Description: Detachable heavy duty front sling swivel
Rail Type: Picatinny
Dimensions: 1.125in (L) X 0.875in (W) X 1.125in (H)
mi-hd-swivel-001mi-hd-swivel-002mi-hd-swivel-003mi-hd-swivel-004